
Okta Single-Sign-On
This document describes how to integrate Optimove with Okta’s identity provider system, to implement a SAML-based Single-Sign-On flow in Optimove.
Follow these instructions to prepare your Okta account for integration with Optimove.
Setting Up the Integration in Okta
- Create a user in Optimove.
- Create a user in Okta.
- Log in to your Okta account as admin.
- From the Okta dashboard, click Admin to reach the Admin Dashboard.
- Go to the Applications tab.

- Click Add Application.
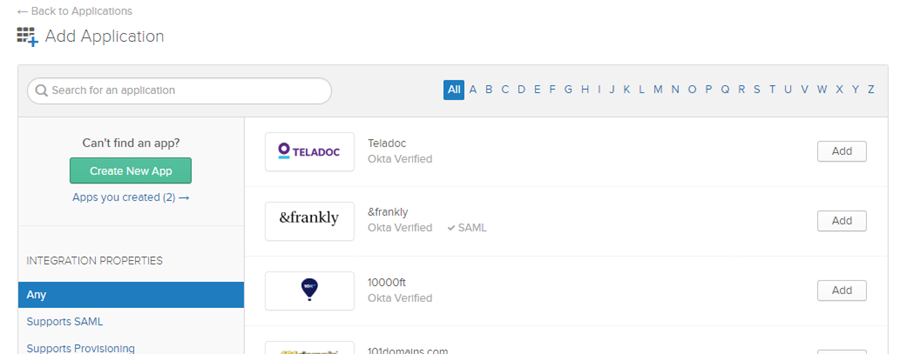
- Click Create New App. The Create a New Application Integration window opens:
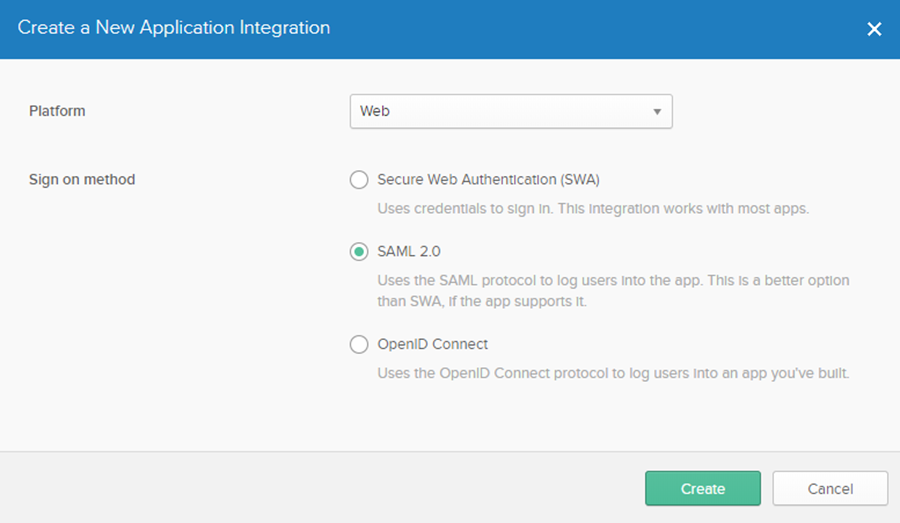
- Set Platform to: Web.
- Set Sign on method to: SAML 2.0.
- Click Create.
Now, in the Application window: - Set App name to: Optimove Site.
- Upload the Optimove logo (Optional).

- Click Next.
In the below steps, please replace XXX with the name of your Optimove site - XXX.optimove.net;
make sure to use lower-case letters
- Set Single sign-on URL to: https://optimove-production.eu.auth0.com/login/callback?connection=XXX-okta
- Set Audience URI (SP Entity ID) to: urn:auth0:optimove-production:XXX-okta
- Set the Application username to: Email

-
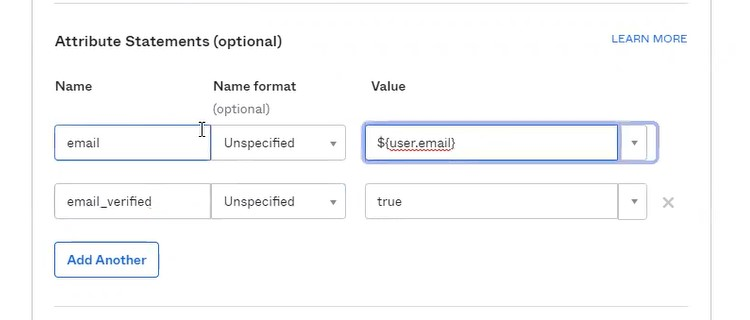
Add the following Attribute Statements:
Email
- Name: email
- Name format (optional): Unspecified
- Value: $EMAIL
Email_verified
- Name: email_verified
- Name format (optional): Unspecified
- Value: $VERIFICATION_ATTRIBUTE
The Email_verified attribute refers to the method of verification for email addresses used in your Okta profile. You must provide Optimove with the email verification attribute name and format used for verification. If email verification is not available or is not in use in your Okta profile, use the constant value “true” instead of the attribute value.
Email_verified
- Name: email_verified
- Name format (optional): Unspecified
- Value: true
-
Click Preview the SAML Assertion to generate XML and verify that your settings are
correct. -
Click Next.
-
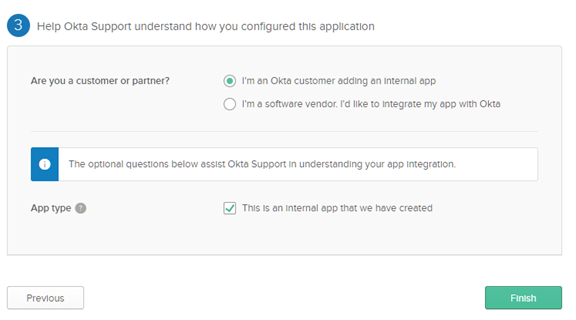
In the next window, answer the "Are you a customer or partner?" question by selecting "I'm an Okta customer adding an Internal app".
-
Click Finish.
- Once you have completed the above configuration, click on the Sign On tab.
- Click View Setup Instructions.
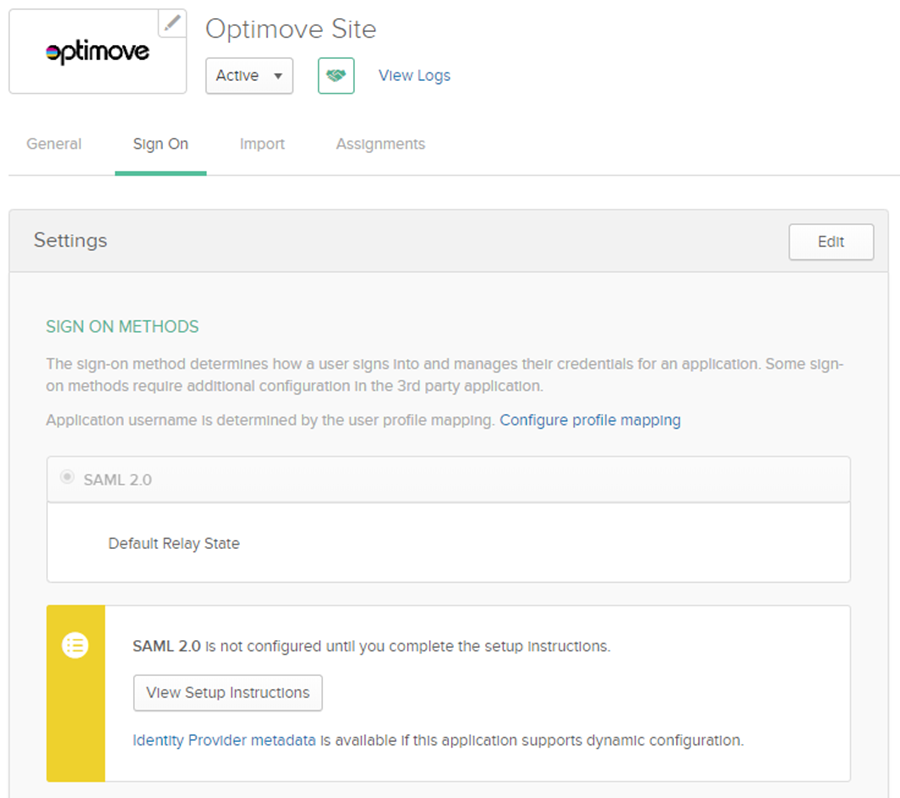
- From the next window, copy the following values generated by Okta:
- Identity Provider Single Sign-On URL
- The X.509 Certificate file (click Download certificate)
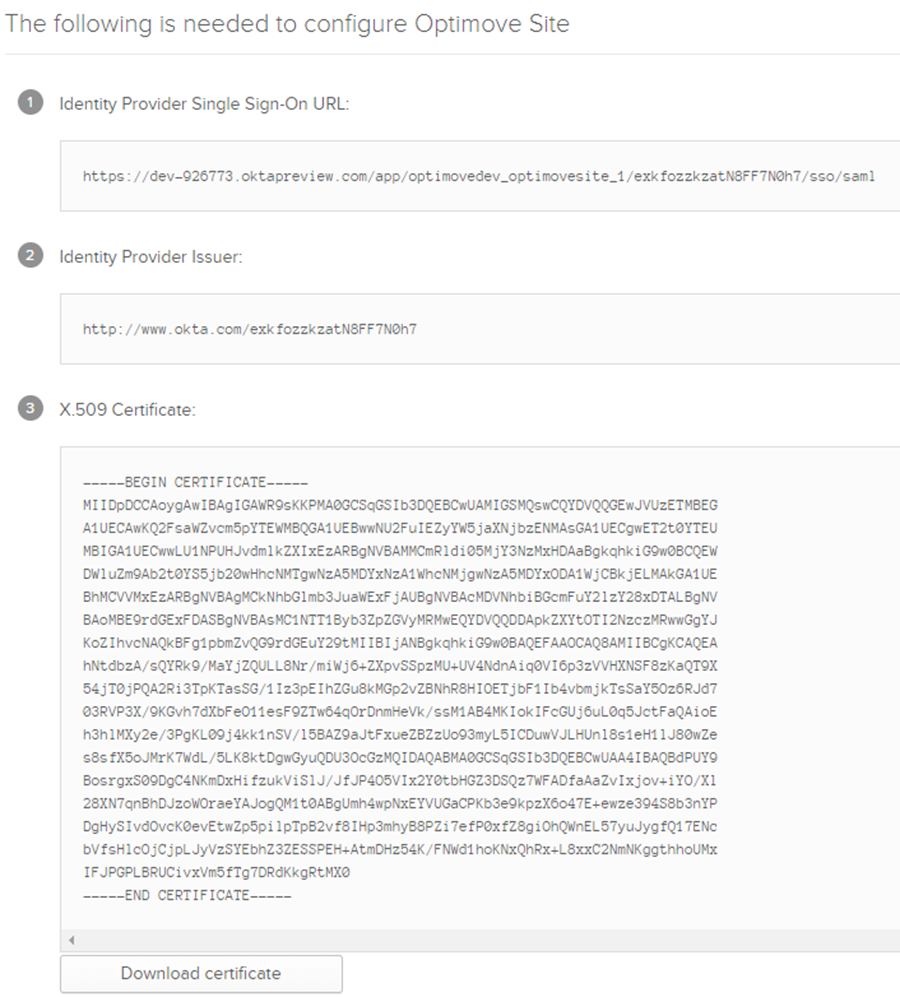
Please use the Information you copied (Login URL and SAML certificate in .PEM or .CER format only) and share it with the Optimove team in the following form. This will open a ticket for the Optimove team.
Optimove will notify you once the configuration is ready and schedule a date to turn on the SSO connection.
Optional – You may add test user credentials in the form; this test user should be created by you in both Optimove and Okta with Optimove as the assigned application; this user will be used to test the integration by the Optimove team.
Updated 2 months ago