
SFTP Integration
Important Note: SFTP Integration is for Channels only.
Integrate Your Service with Optimove Via SFTP
This document provides instructions for integrating with Optimove via SFTP.
Step 1: Inform Optimove of the channel you would like to use for the SFTP integration.
You can also ask your CSM to rename this channel.
Step 2: Share the information below with your CSM.
- SFTP Username and Password
- SFTP Folder
- SFTP Port
- List of Customer Attributes to use as Personalization Tag.
Step 3: Synchronize the template list with Optimove.
In order for the templates available in your system to be selectable by marketers when scheduling campaigns within the Optimove UI, the list of available templates must be synchronized between your service and Optimove via API. In other words, your service will provide the Optimove API with the key-value pairs that point to the content in your system (for example, the HTML template for emails or the text content of SMS messages).
- AddChannelTemplates – Provides Optimove with the names and IDs of templates that will be available for selection by marketers when scheduling a campaign to be executed by your service
- DeleteChannelTemplates – Removes previously-added templates
- GetChannelTemplates– Retrieves an array of all defined template IDs and associated names
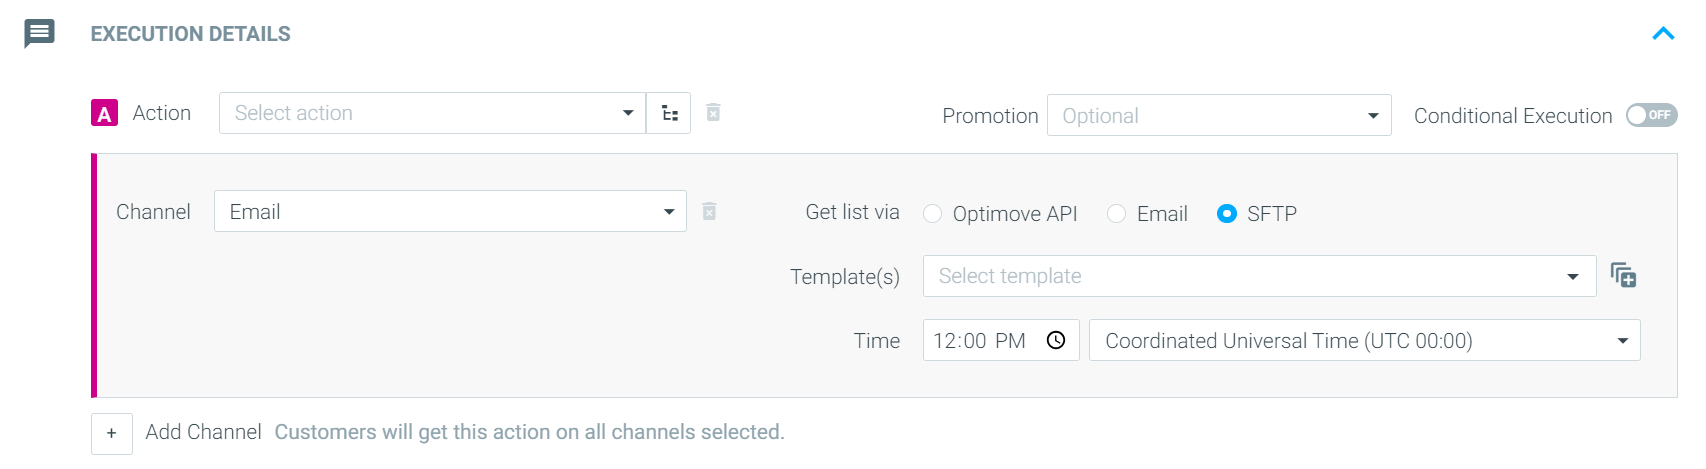
Once templates are added to Optimove, marketers can select them in Optimove’s Campaign Builder when setting up a campaign that will be executed via your service:
Important note: Your system should call the appropriate API function(s) every time that a new template is added, a template is deleted or a template’s name has been changed. This will ensure that the list available to marketers within Optimove is always accurate and up to date.
Step 4: Optimove will upload the SFTP files.
As soon as Optimove has completed preparing each new campaign, it will upload two SFTP files to your system.
Step 5: Retrieve Campaign Execution Details from the SFTP files.
- 1st File – Campaign Metadata Information that includes Execution date, Channel, Action ID, Action name, Test Action Target Group, Template ID, Template Name, and Schedule Time.
- 2nd File – List of Customer IDs with the Customer Attributes you define. The list of customer attributes will populate every SFTP channel.
Please Note
- The Naming Convention of the files is as follows:
- PlanID_TenantName_TargetGroupName_ActionName_ChannelName_Date.csv
Step 6: Update Response Metrics
Following the execution of a campaign, your system should push campaign delivery and response metrics to Optimove using the UpdateCampaignMetrics and UpdateCampaignInteractions API calls.
In order to ensure this data is displayed properly within the Optimove’s Campaign Analysis and Customer Explorer reports, it is important to call UpdateCampaignMetrics and UpdateCampaignInteractions several times a day for seven days following the execution of each campaign.
Important Notes:
- Customer Attributes are according to the Real Field Name and can’t be modified.
- PlanID is the unique Campaign ID Optimove generates per each campaign.
- It is not possible to change the naming convention of the files.
- Metadata files cannot include additional information such as Tags and Notes.
- The format of the scheduled time is MM/DD/YYYY. Ex: 10/12/2023 1:20:32 PM (W. Europe Standard Time).
- The type of the files is CSV. It is not possible to change it.
Updated 9 months ago