
Simple Activation Flow
This guide explains the simple activation flow, which works for both scheduled and real-time triggered campaigns. This flow is designed for fast, low-effort integrations where your system's main role is to initiate the process, after which Optimove's services take care of the operational logic.
This approach is perfect for standardized, repeatable promotions or any campaign where speed to market is a priority and you do not need to apply complex custom logic before a reward is granted.
Prerequisite: Register a Webhook Listener (One-Time Setup)
Before you can use this flow, your system must be able to receive notifications from Optimove. This requires registering a pre-configured HTTP POST endpoint that you control.
- To register your endpoint, use the
RegisterEventListenerAPI withEventTypeID: 5for scheduled campaigns. For triggered campaigns, refer to the full setup guide.
The Activation Flow
The activation flow begins with a webhook from Optimove and is managed almost entirely by Promotions's services. This sequence is designed for simplicity, where your system's only role is to perform the initial hand-off, after which the entire validation and reward process is handled automatically.
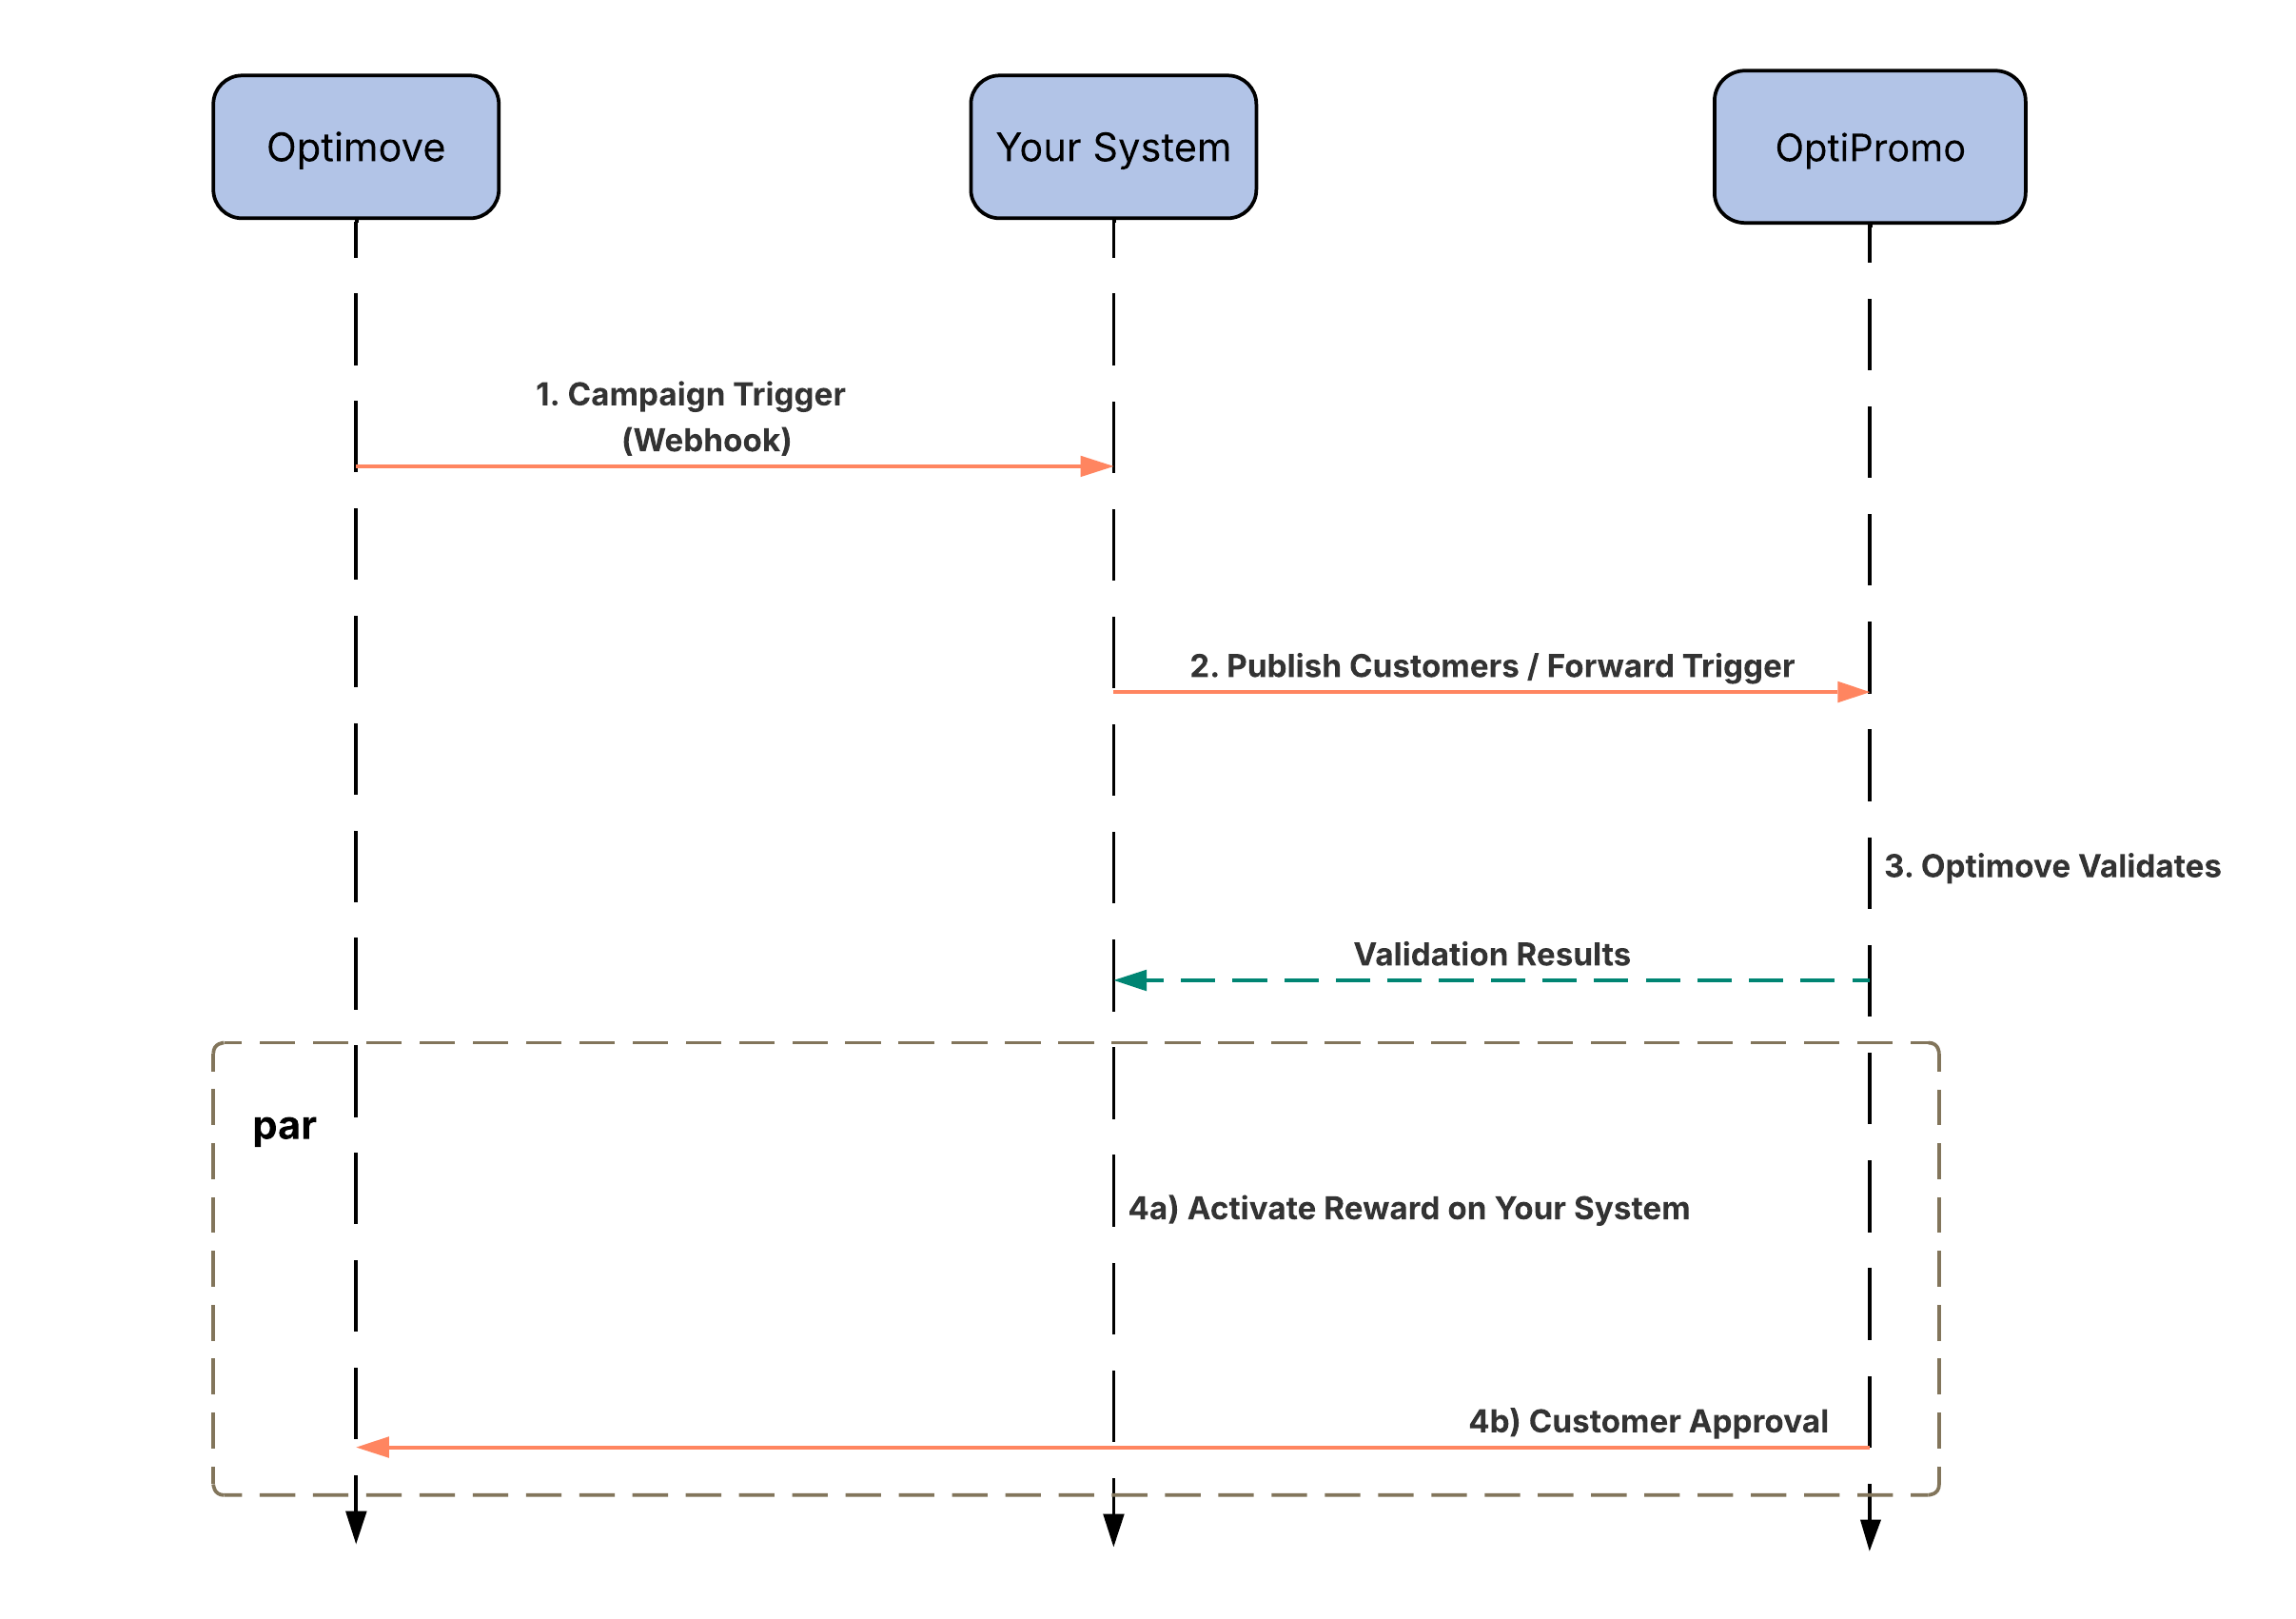
Sequence Diagram for the Simple Activation Flow
1. Campaign Trigger (Webhook)
What happens: An Optimove campaign is executed and sends a webhook notification to your registered endpoint.
Why it's important: This webhook is the starting signal, informing your system that a promotion has been initiated and providing the necessary campaign details to proceed.
2. Publish Customers / Forward Trigger
What happens: Your system forwards the promotion details to the Promotions service.
- For scheduled campaigns, this means first calling the
Get Campaign CustomersAPI to get the customer list, and then publishing that list to Promotions. - For triggered campaigns, you simply forward the single customer's trigger.
Why it's important: This is the core "hand-off" step. By making this call, your system transfers full responsibility for the promotion's execution to Optimove. It's a "fire-and-forget" action that removes the need for complex logic on your side.
3. Promotions Validates
What happens: This step is handled entirely by Promotions's backend. It automatically validates each customer's eligibility against all promotion rules, tiers, and budgets. The results of this validation are returned to your system.
Why it's important: This highlights the main benefit of the simple flow. All the heavy lifting of validation is managed by Optimove. Your system simply receives a confirmation that the rewards are ready and allocated.
4. Activation and Approval (Parallel Actions)
What happens: Following a successful validation, the final activation steps occur in parallel:
- 4a) Activate Reward on Your System: Your system can now display the reward to the customer in the UI (e.g., show a "You have a bonus!" banner).
- 4b) Customer Approval: In the backend, Promotions finalizes the reward allocation and updates the customer's status once they interact with or claim the promotion.
Why it's important: This shows that while your system's active role is complete after Step 2, the loop is fully closed by Promotions's backend, ensuring the customer receives the reward and all reporting is handled correctly.
API Reference
Your system will need to make the following call to implement this flow.
Next Steps
- To learn about a flow that gives your system full control over the validation process, see the next guide: ➡️ Advanced Activation Flow
Updated 3 days ago